| Translating Photoshop Files with Rainbow |
| Back to Previous Page |
|
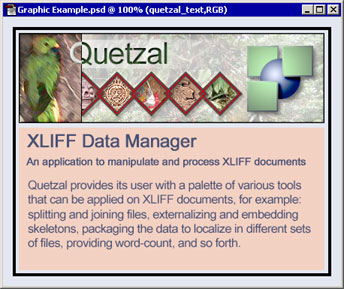
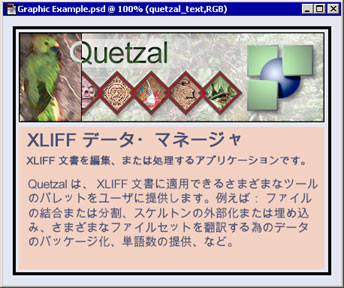
Rainbow offers filters to prepare files in various formats, one of them is PSD, Photoshop native format. The following example shows the different steps to execute to extract, translate and merge a Photoshop file, using Rainbow's filter. Rainbow is part of the RWS Tools and can be downloaded at http://www.translate.com/tools. To start Rainbow, select the Programs menu from the Start main menu, then select Rainbow from the RWS Tools sub-menu. Imagine that you have a PSD file to localize. Select the command Add from the Input menu, or click the Add button at the bottom of Rainbow's main window. Select the file to localize and click OK. You can also simply drag and drop the file in Rainbow's input files list. The sample we will use in this demonstration is shown below: a simple graphic with four text layers.
Figure 1 - The original Photoshop file. Now you have to prepare the files for translation. To do this, select the command Prepare For Translation from the Tools menu. This will open a dialog box with several tabs where you can specify the various options to prepare the files. The first tab is Work Environment. Select the option XLIFF document for the translation environment, unselect the option Include the source files in the package (no need to send the PSD to the translator).
Figure 2 - The Work Environment tab. Move to the next tab: Source Option. The input files are in English-US, select the appropriate locale. The encoding does not matter since the PSD file will use UTF-16 and the filter knows it.
Figure 3 - The Source Options tab. Move to the next tab: Target Options, Here select the target language for which you want to prepare the files. Select Japanese and pick UTF-8 for the encoding.
Figure 4 - The Target Options tab. Move to the last tab: Package.
This is where you specify the location of the output files. By default
they will go to a folder called
Figure 5 - The Package tab. When you have set all the options, start the preparation by clicking Execute. When the preparation is done, select the command Open Last Package Folder from the Tools menu, or click Ctrl+L. This will open the folder where the output files have been generated as shown in figure 6.
Figure 6 - The package directory structure. The package folder ( To translate the XLIFF
document, you need an XML-enabled translation tool. You could also
open the file in any XML editor and do the translation inside the One tool that allows to translate XML document is TagEditor from
TRADOS. However, TagEditor does not currently support XLIFF as a
localization format, but just as another XML format. You need a DTD
Settings file for XLIFF and XLIFF documents where the source text is
copied into the Once TagEditor has the DTD Settings file correctly set up, you can simply open or drag and drop the XLIFF document to translate, and start translating, as shown in Figure 7.
Figure 7 - The PSD text layer extracted in XLIFF and translated in TagEditor. Once the file is translated: save the result (command Save As Target from the File menu). You will get a bilingual XLIFF document. This is the file you will now need to merge back with the Skeleton file to create the translated PSD file. Start Rainbow again. Drag and drop the translated XLIFF document in Rainbow's main input file list. Select the command Post-Process
Translation from the Tools
menu. This will open the Post-Process
Translation dialog box. In the Files
Location tab, Select the location of the Skeleton file (Same
folder as the input file) and the place where you want to create
the new PSD file (here: a
Figure 8 - The Location of the Skeleton and output files. Move to the last tab: Target Options. This is where you specify the parameters for the output files. Select Japanese for the locale. With a PSD file the other options do not matter because the filter will use the appropriate settings automatically.
Figure 9 - The target options. Click Execute when you are ready. A new PSD file is created in the output folder you have selected. When opening the PSD file, Photoshop will ask you whether you want to update the layers because they have been modified. Answer Update. The resulting PSD is shown in figure 10:
Figure 10 - The translated PSD file. In some cases the translated text will be longer than the original
text. When this occurs, Rainbow will merged an ID number instead of the
translated text. This last part of the ID number corresponds to Note that Rainbow's Photoshop filter is one of its Extra Features for which you need a key. You can request a key by filling this form on the RWS Web site. (See also the Preferences dialog box in Rainbow).
|